1.1 Accessing the Notification Center
You can accessing your email templates using the Notification Center. There are two separate locations that you can locate the Notification Center.
- From the Home Dashboard – The notification center from the home dashboard contains all the Templates for your site, this include your Global Templates and the templates for all your active applications. This is useful if you have templates to create for multiple applications or you have a template that you want to change in multiple application. You will need to select each application and make the adjustment for each. (see: Exercise 1)
- From The Evaluations Dashboard – When accessing the notification center from the Evaluations Dashboard you will only be accessing the email templates that are for the specific application you choose when opening the Evaluations Dashboard. (see: Exercise 2)
Exercise 1
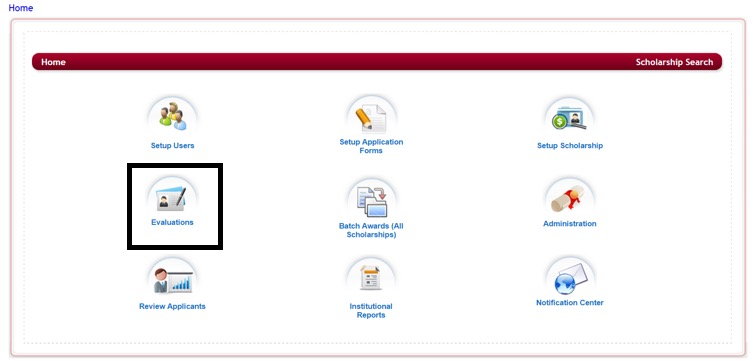
Step 1: After logging into the system from the Home Page, select the Notification Center icon.
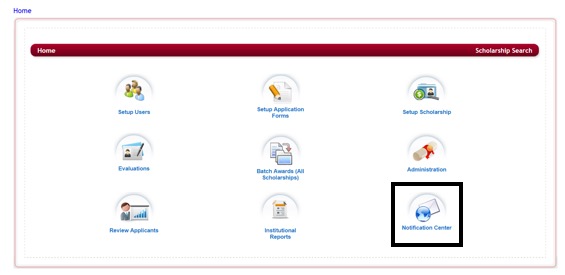
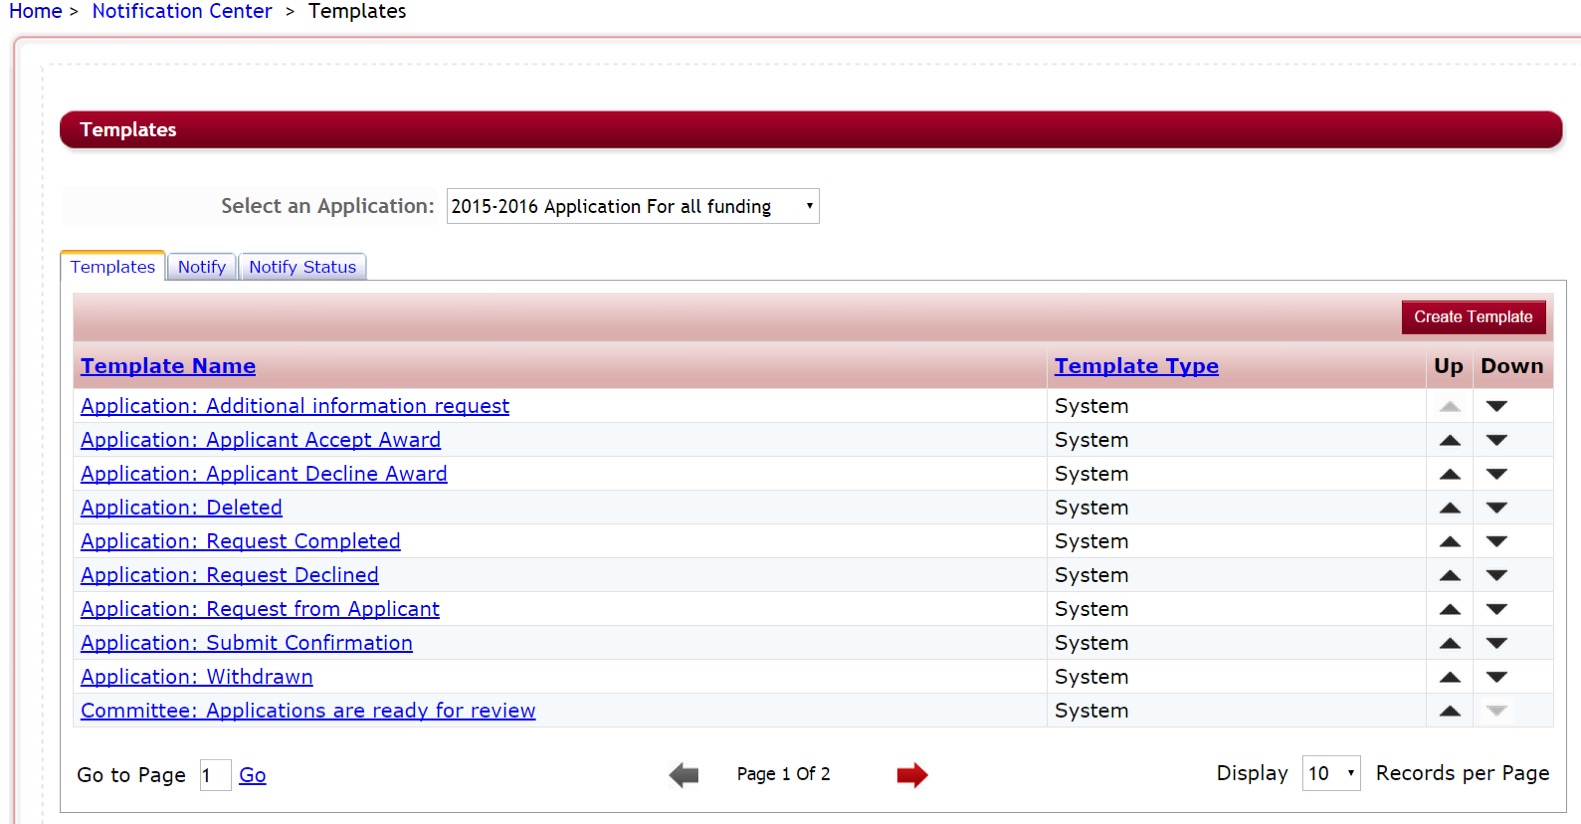
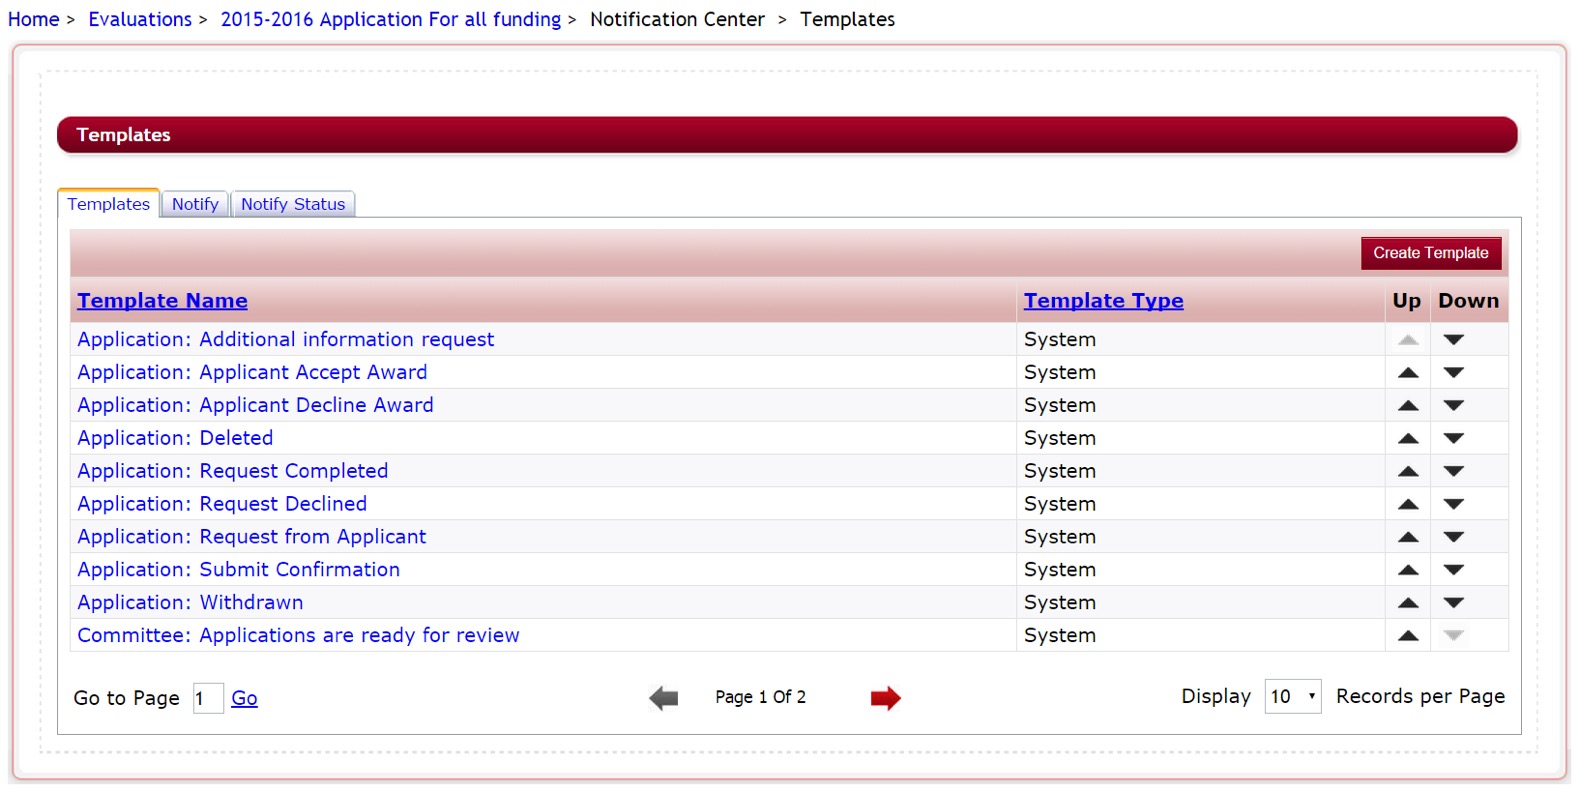
Step 2: This will direct you to the Templates page.
Exercise 2
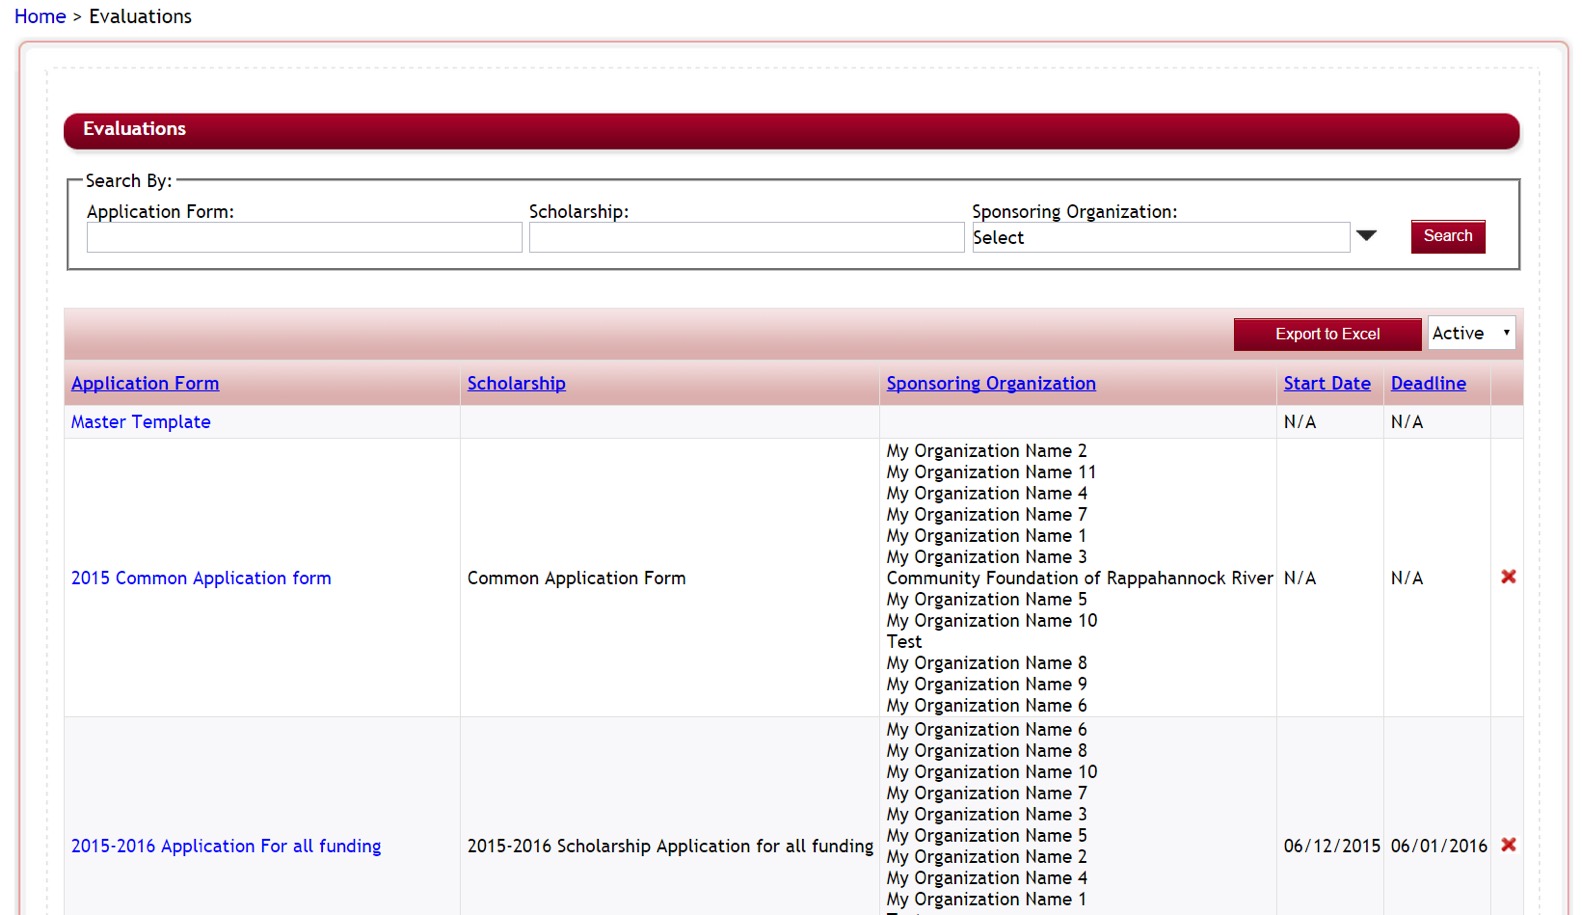
Step 1: After logging into the system from the Home Page, select the Evaluations icon.
Step 2: This will take you to the Evaluations’ Application listing page. Select the application you want to view your email templates for by clicking on the application name under the Application Form Column.
Step 3: You will now be at the Evaluations Dashboard for the application you selected.
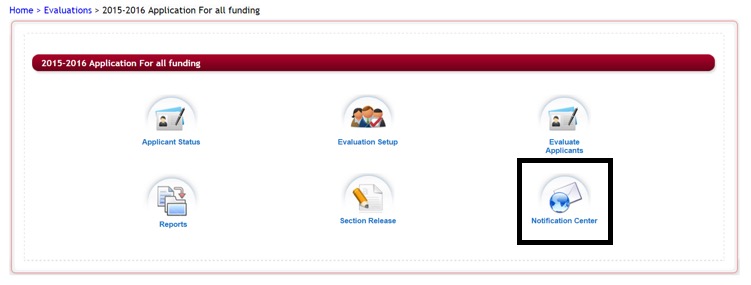
Step 4: Click on the Notification Center icon from the Evaluations Dashboard
Step 5: You will now see the email templates just for the one specific application that you chose. You will not be able to access the global templates as those can only be accessed from the Home dashboard, Notification Center.
1.2 Understanding the Email Template Types
System Templates:

System email templates are automatically generated by the system when you create a new application and are linked to their specific features within the application process (i.e. Application: Submit Confirmation email is automatically generated when the applicant submits their application form).
Custom Templates:

Custom Templates are any additional templates you create for your application.
1.2.1 System – Global Templates
These are System templates that apply to all applications and are not application specific.
Exercise 1
Step 1: To see the Global Applications select “Select” in the Select an Application
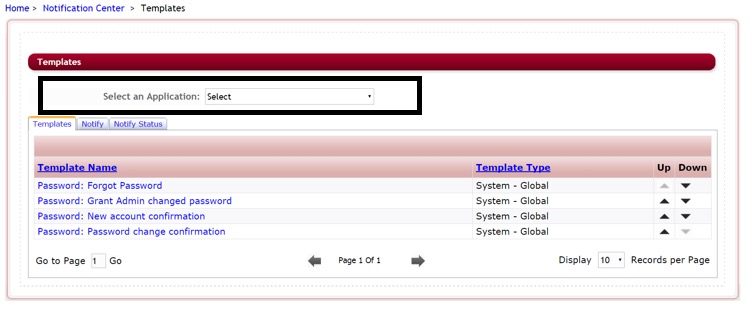
The following are your Global Templates:
- Password: Forgot Password – Message to all users that click the “Forgot password?” on their login. They will receive a link in that email to click on that will give them direction on how to retrieve a new password.
- Password: Grant Admin Changed password – Message to all users. If you edit a user profile in the Home>Setup Users, and click Reset Password for that user they will receive an email with their new login information. (this is currently being restructured, and not used, the email that goes out is currently not editable but will contain a temporary password for the user to log in with that they can change)
- Password: New Account confirmation – Same message is sent to all users in the system.
i. When applicant creates their own account prior to login
ii. When Admin creates an account for a user in the Users Setup section and does not select the Assign password manually. - Password: Password change confirmation – User has changed their own password – message to all users. (this is currently being restructured, and not used. When a user changes their password, they will receive an online message notifying them of the change)
The above templates are key items that need to be edited prior to going live with your system.
1.2.2 System – Application Specific Templates
System – Application Specific Templates are templates created specifically for an application. These templates appear on all your applications individually, so if you need to make a change to any of them you will need to change them in each specific application.
Exercise 1
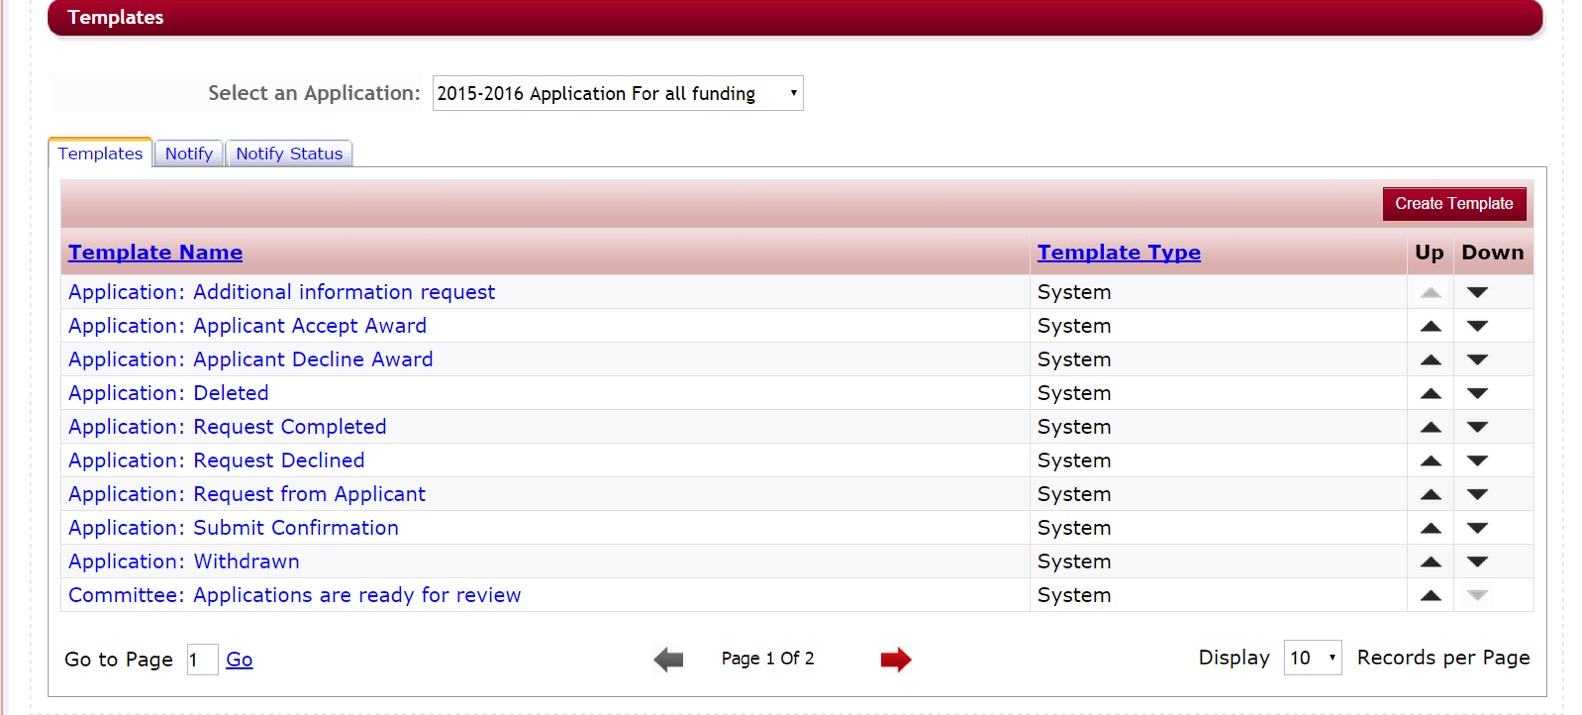
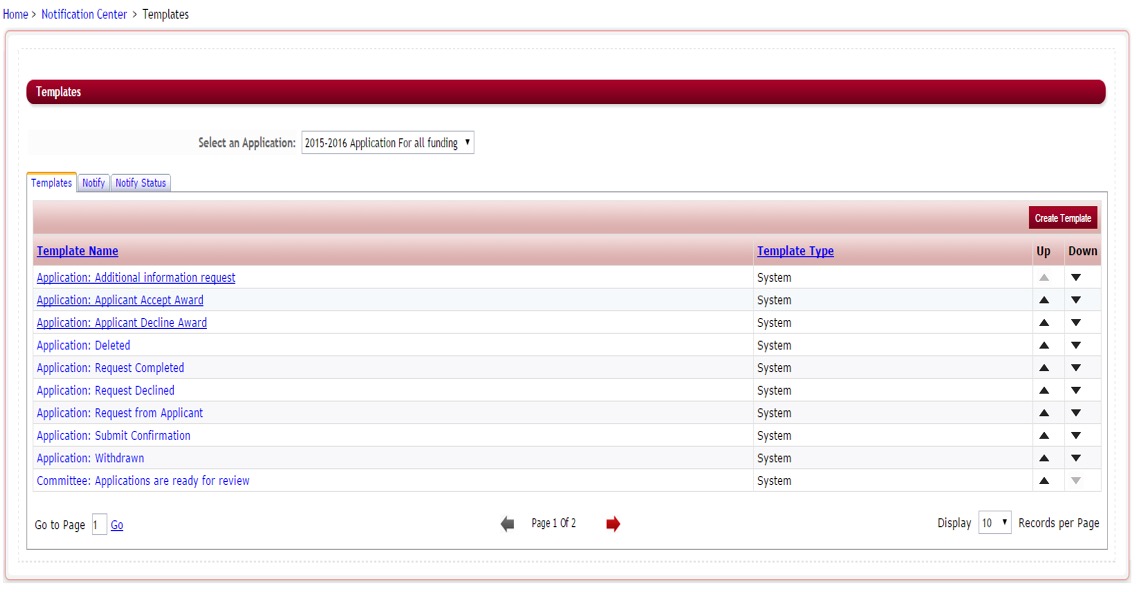
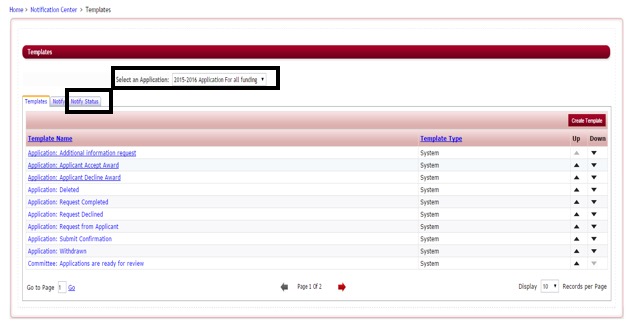
Step 1: To see the templates for a specific application, select the application name in the Select an Application and then view all the templates for that application.
Step 2: Once you have selected an application the current templates that are available for the specified application will appear:
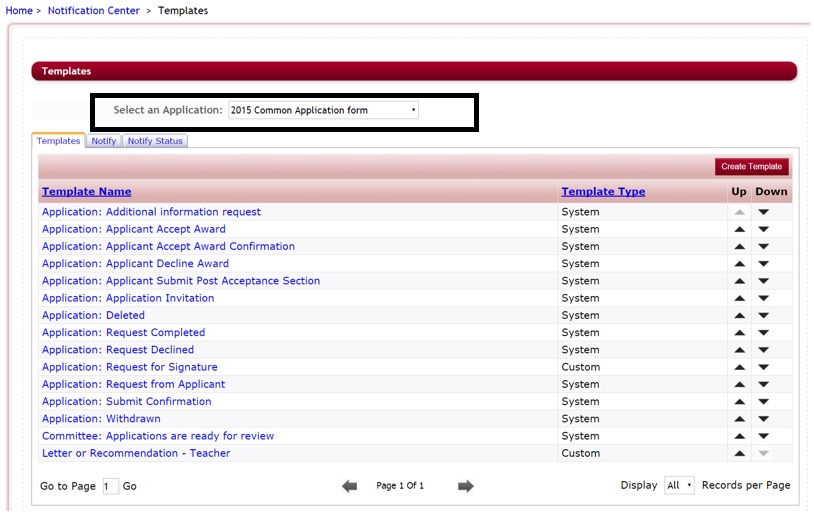
You will need to select each separate application and view the templates for each.
The System – Application Templates include the following, before going live please edit appropriately to your process:
- Application: Additional information Request – Sent to applicant when requested by the Administrator to complete a section after submittal.
- Application: Applicant Accept Award – Sent to the contact assigned to the application. This email will be sent when the applicant accepts their award.
- Application: Applicant Decline Award – Sent to the contact assigned to the application. This email will be sent when the applicant declines the award.
- Application: Applicant Submit Post Acceptance Section – if the Administration>Site Settings>General Settings: Enable Post Acceptance Section Submit Notification is set to “Yes”. Then when a section that is marked as a Post Acceptance Section type is completed and the applicant re-submits their application form, this email will be sent to the Application Contact that is set on the General Information section of the application setup.
- Application: Application Invitation – used when inviting an applicant to apply to a private application using the Application Invitation feature located in the Administration Dashboard. This email is sent to the applicant notifying them that they have been invited to apply to the application form, giving the applicant their login credentials as well as the link to the private application form.
- Application: Deleted – Sent to the application contact (The contact entered in the general information setup for the application). This email will be sent when the applicant deletes their entire application.
- Application: Request completed – Email to Applicant once recommended individual has completed the request section
- Application: Request Declined – Email to Applicant notifying them that the individual they recommended to complete a request section has denied the request.
- Application: Request for Signature – (custom template standard on site – nomination email) for Request Sections – email to recommended individual that you may be requesting a signature for that individual. When creating the request section you would select this email template, instead of the default email, if that request is for a signature.
- Application: Request from Applicant (Default email)(nomination email) for Request Sections – Email to Recommended individual requesting to fill out a section on behalf of the applicant
- Application: Submit Confirmation – Submit confirmation email sent to applicant once they submit their application
- Application: Withdrawn – Sent to the application contact (The contact entered in the general information setup for the application). This email will be sent when the applicant has withdrawn their entire application.
Committee: Applications are ready for review – Sent to the reviewers when using the notify button in the Evaluations>Evaluation Setup>Assignment section.
1.3 Editing System Templates
When you first get your site it is best practice to open each email template and read the content of all your email templates. If the message is not what you want to relay you will need to edit them to relay the appropriate message for your applicants. Personalizing them to fit the needs of your organization.
Best Practice: Before editing your email templates it is best to review them as a group with the other members of your staff and to decide on your branding strategy. Then you can edit your templates accordingly by starting with the Global Templates. Maintaining a procedure for how emails will be handled in your organization for applications that are created in the future is critical.
Exercise 1
Step 1: Open the Notification Center.
Step 2: Select the Application in the Select an Application that you want to edit the template for or choose “Select” to edit the Global template.
Note: If editing a template that is located in every application, you will need to select each separate application and make the change to the same template in each application separately.
Step 3: Select the template you want to edit, by clicking on the Template Name under the Template Name Column. (select the Application: Submit Confirmation for this exercise)
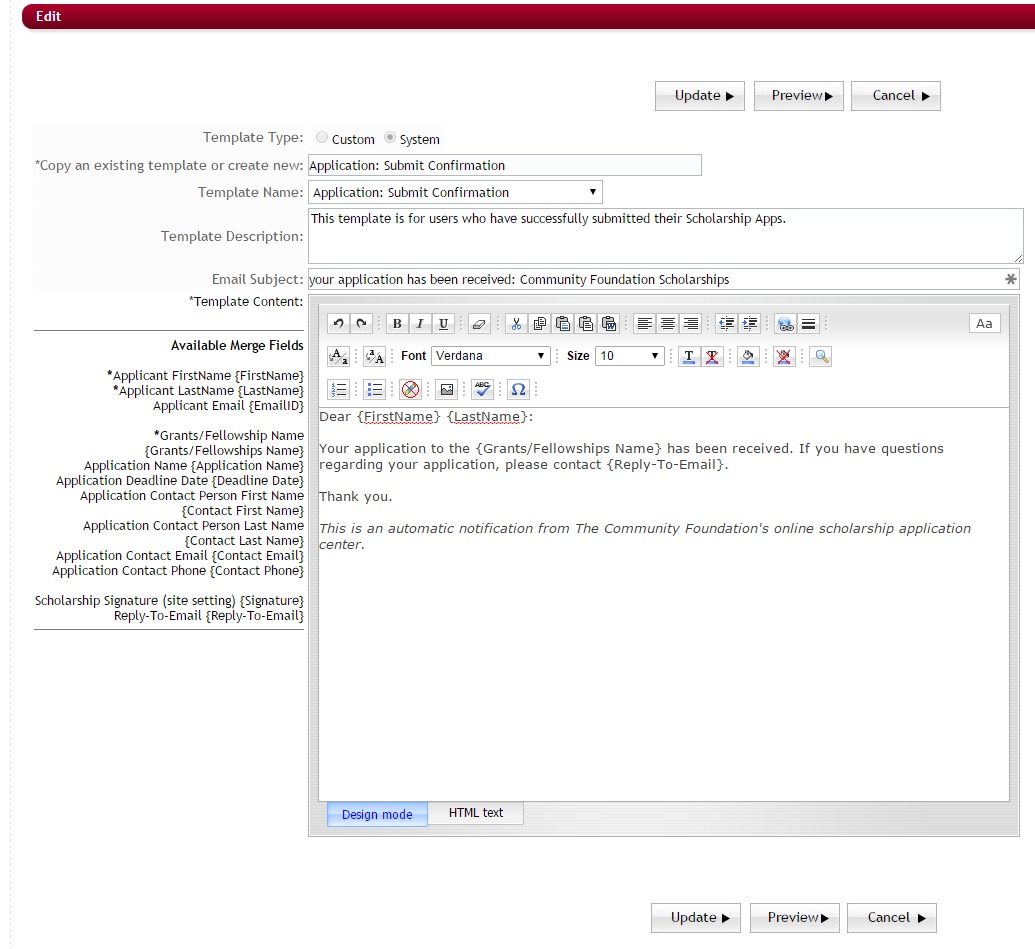
Step 4: The edit email template will open similar to the example below:
Step 5: Make any appropriate changes to the email template by typing those changes directly into the editor box.
Below is an explanation of the items in the email template.
- Template Type: The type of template, system template or custom template
- Copy an existing template or create new: This is an automatic default depending on the type of template and cannot be updated.
- Template Name: The name of the template.
Note: When editing system templates the Template Name cannot be edited.
- Template Description: Brief description of the template’s purpose, only internal staff can view this.
- Email Subject: To add a subject line to your email, enter the Email Subject in this field.
Best Practice: Place the name of your Organization in the Subject Line: (ex. Change subject line to: (Organization Name) – Your application has been received).
- Template Content: The content information for the email template. Content can be entered using either of the following tabs:
- Design Mode: The design mode editor works exactly the same way as Microsoft Word works. Type the information into the body of the editor as you would be typing and formatting it in a Microsoft Word document. You can also copy and paste the formatted text from other documents.
- HTML Text: You can create email templates using html tags by clicking on the HTML Text tab present beside the Design Mode tab. Enter the html tags with the content and it will display all the content as formatted.
- Available Merge Fields for Custom generated templates: To the left of the editor’s box are Available Merge Fields that you can copy and paste into your email. Simply highlight, right click, copy and paste into the body of your email. (See the section: Using Merge Fields for more detailed explanation of what each is mapping to in the site).
These are auto-populated fields that the administrator can use when setting up an email template. When you send an email, these fields will automatically be populated with the desired data. For example, if the administrator chooses {First Name}, it will automatically change to the applicant’s actual First Name,
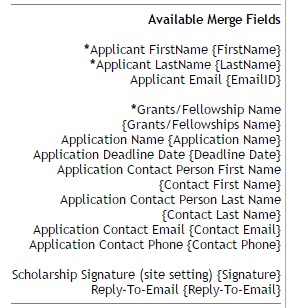
Note:Use caution not to add extra spaces or delete any of the field when copying it. Each template has certain Merge fields available if the field you are looking for is not listed in the column to the left then it is not available for this specific template.
Step 6: After you have completed the edits, click on the Update Button to save your changes.
- Preview: Allows you to see a layout preview of what the email will look like when sent.
- Cancel: Click the Cancel to cancel any changes you have made.
Step 7: After you have updated your Template, the system will return you to the list of Global Templates.
1.4 Creating a Custom Email Template
Along with System Email templates there is also the ability to create custom email templates for your application process. The following are ways this is helpful:
- You have emails you like to send out to users periodically that you would like to create for your application process.
- You have multiple request sections in your application and therefore need separate email templates for each section.
Exercise 1
Step 1: Open the Notification Center.
Step 2: Select the Application in the Select an Application that you want to add a custom email template to.
Note: if creating a custom template that applies to multiple applications, you will need to select each separate application and create the template separately in each
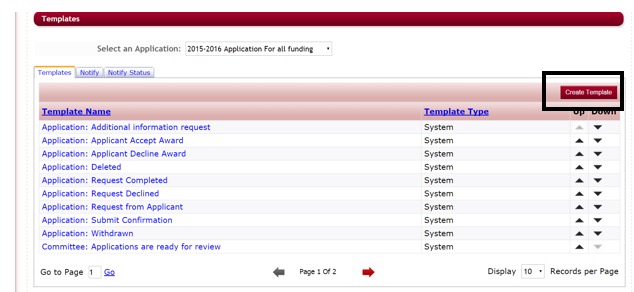
Step 3: Once the Template listing appears for that application, click on the Create Template button. This button is located to the right of that listing header.
![]()
Step 4: When you click on the Create Template button the following screen is displayed:
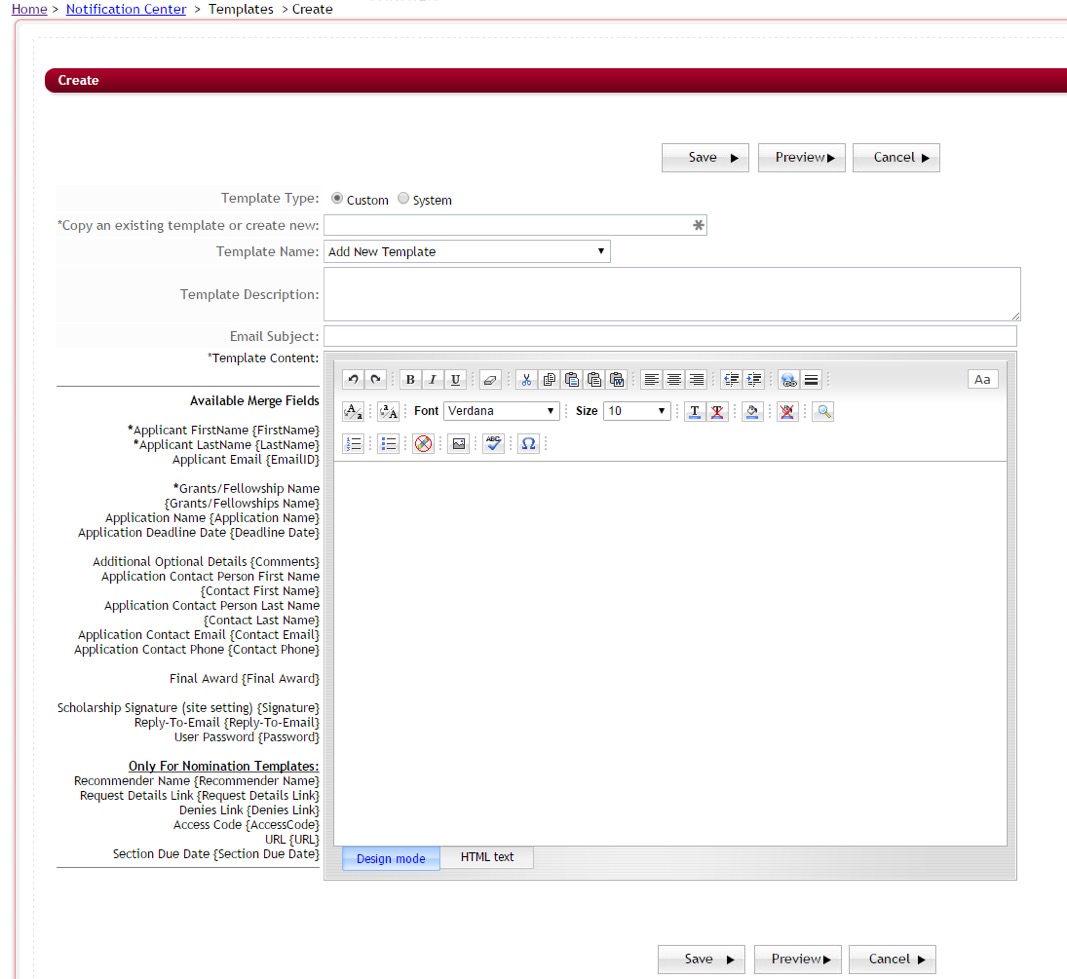
Step 5: Template Type: Select Custom (Only custom templates can be created. System emails must be created by a CommunityForce developer and are hard coded to a specific area within the application).
Step 6: Copy an Existing Template or Create New: To create a New Template you will leave this blank. Once you do Step 7 and select the Add New Template in the Template Name field, this will then open this field where you can enter the name of your new email template.
Step 7: Template Name: Select Add a New Template from the dropdown to create a new template. Then enter the name of your new template in the line above “Copy an Existing Template or Create New”.
- Note if you are creating this template to be able to select it as the Section Email in a Request section, select the Add New Nomination Template instead.
Step 8: Return to the “Copy an Existing Template or Create New” and enter the name of your new template. This is the name that will appear in the template listing when viewing the available templates for your application.
Step 9: Template Description: Enter a description of the templates purpose. This is viewable by staff only.
Step 10: Email Subject: This is the subject line that appears in the recipients email. To add a subject line to your email, enter the Email Subject in this field.
Step 11: Template Content: Enter the content for the email template. Content can be entered using either of the following tabs:
- Design Mode: The html editor works exactly the same way as Microsoft Word works. Type the information into the body of the editor as you would be typing and formatting it in a Microsoft Word document. You can also copy and paste the formatted text from other documents.
- HTML Text: You can create email templates using html tags by clicking on the HTML Text tab present beside the Design Mode tab. Enter the html tags with the content and it will display all the content as formatted.
Step 12: Available Merge Fields for Custom generated templates: To the left of the editor’s box are Available Merge Fields that you can copy and paste into your email. Simply highlight, right click, copy and paste into the body of your email. (See the section: Using Merge Field for more detailed explanation of what each is mapping to in the site).
- These are auto-populated fields that the administrator can use when setting up an email template. When you send an email, these fields will automatically be populated with the desired data. For example, if the administrator chooses {First Name}, it will automatically change to the applicant’s actual First Name, while sending a mail.
- Note: Use caution not to add extra spaces or delete any of the field when copying it. Each template has certain Merge fields available if the field you are looking for is not listed in the column to the left, then it is not available for this specific template.
Step 13: Save: Click on the save button after adding all the content to save the changes and go back to the Email Tools page.
- Preview: Allows you to see a layout preview of what the email will look like when sent. Note, the merge fields will not be populated when previewing.
- Cancel: Click on the Cancel button to go back to the Email Tools page and cancel any changes you have made.
Best Practice:
Add New Nomination Template: (Default emailis Application: Request from Applicant for Request Sections) If creating a new email template to be used in a request from applicant section (Nomination Template) below are a few things to consider:
- Are you including the Comment section in this email?
- If using more than 1 request section are there different email messages you want to send for each. Did you create the templates for these?
- Be sure to connect the correct template to the correct request section?
1.5 Sending Email Notifications out using a Template
Exercise 1
Step 1: Open the Notification Center.
Step 2: Select the tab “Notify”. The following screen will appear:
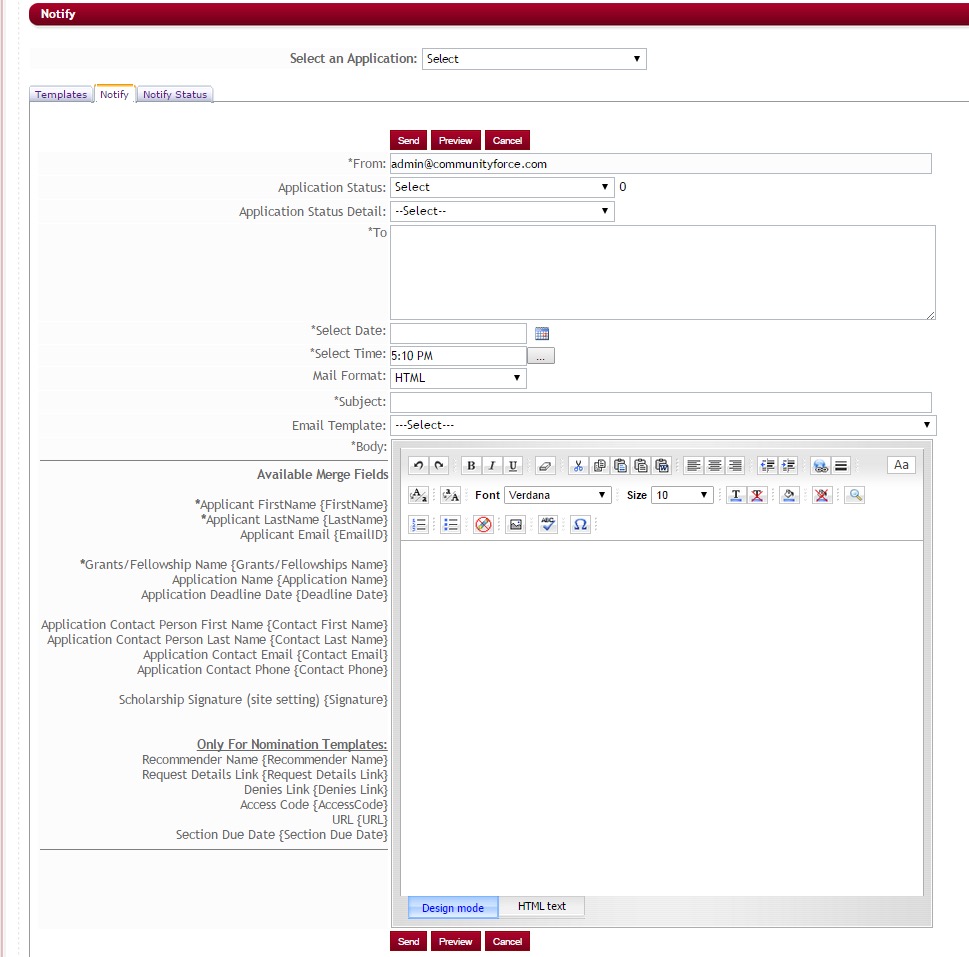
Step 3: Select the Application in the “Select an Application” that you want create the notification email for.
Step 4: From: This is the email address that the emails are sent out from. This is a system-generated address. Leave the address that is automatically populated there.
Step 5: Application Status: This is the application status of an applicant’s applications. Select which status group you want to send the email to. Once you select the Application Status the User Count to the right will show the total number of applicants to whom the mail will be sent. This will also populate the “To” field with a listing of all the applicant’s emails that fall under the selected Application Status. If you do not want to select a group by “status”, then you can leave this as “select”
Step 6: Application Status Detail: You can select a group of applicants by the Application Status Detail they are in. Click on the dropdown to see a listing of the Application stages that are available for your funding sources. This will populate the “To” field with a listing of all the applicant’s emails that fall under the selected Application Status Detail. If you do not want to select a group by “status detail”, then you can leave this as “select”
Step 7: To: If you have selected an Application Status and/or an Application Status Detail this field will be populated automatically with all the email addresses of those applicants. If you did not select an Application Status and/or an Application Status Detail then you can enter the email addresses of the applicants here, separating each with a semi-colon (;) instead of spaces in between the email addresses.
Step 8: Select Date: Select the date you want the email to be sent.
Step 9: Select Time: Select the time you want to send the email.
- Note 1: The server that sends out the emails is set on Eastern Time. Therefore, depending on what time zone you are in you will need to adjust enter your select time to correspond with the appropriate PST or PDT for the time you want the email to go out on. Note also that the email may be delayed if there is a large volume of traffic at the time the email is being sent.
- Note 2: If you are sending an email and selecting the recipients based on a status or status detail, and sending only to those applicants that have that status or status detail, the applicants receiving that email are only the applicants that were at that specific status/status detail at the time the email was created, not sent. If their status/status detail changes prior to sending it, the email will still go to those individuals.
Step 10: Mail Format: This will send an email in the HTML format or Plain text format.
Step 11: Subject: You can enter the subject of the email that you want to appear in the Subject line to the recipient.
Step 12: Email Template: You can select the template from the existing created templates. If you select a template it will automatically fill in the body of the email accordingly. If you want to create your own email than leave this as Select.
Step 13: Body: If you select an email template then the body of the email will be automatically populated according to how the template reads. If you don’t select any template, you can write the content of the email in the body field. Content can be entered using one of the following tabs:
- Design Mode: The html editor works exactly the same way as Microsoft Word works. Type the information into the body of the editor as you would be typing and formatting it in a Microsoft Word document. You can also copy and paste the formatted text from other documents.
- HTML Text: You can create a mass email using html tags by clicking on the HTML Text tab present beside the Design Mode tab. Enter the html tags with the content and it will display all the content as formatted.
Step 14: Available Merge Fields: To the left of the editor’s box are Available Merge Fields that you can copy and paste into your email. Simply highlight, right click, copy and paste into the body of your email. (See the section: Using Merge Field for more detailed explanation of what each is mapping to in the site).
- These are auto-populated fields that the administrator can use when setting up an email template. When you send an email, these fields will automatically be populated with the desired data. For example, if the administrator chooses {First Name}, it will automatically change to the applicant’s actual First Name, while sending a mail.
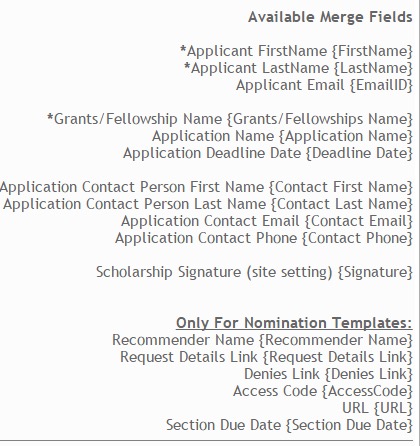
- Note:Use caution not to add extra spaces or delete any of the field when copying it. Each template has certain Merge fields available if the field you are looking for is not listed in the column to the left, then it is not available for this specific template.
Step 15: Send: You can click on the Send button to send the emails.
- Preview: Allows you to Preview the email prior to sending it.
- Cancel: You can click on the Cancel to cancel the email and go back to the Emails Tools page.
1.6 Viewing the Status of sent Emails in the Notify Status Tab
While in the Notification center, the Notify Status Tab shows the status of emails sent using the Notify tab to send your email. It will also show the status of emails sent using the Notify button to send an email when in various reporting areas of the site. (I.e. Evaluations>Applicant Status, notify)
Step 1: Select your application from the dropdown menu.
Step 2: Click on the Notify Status Tab the following screen will appear:
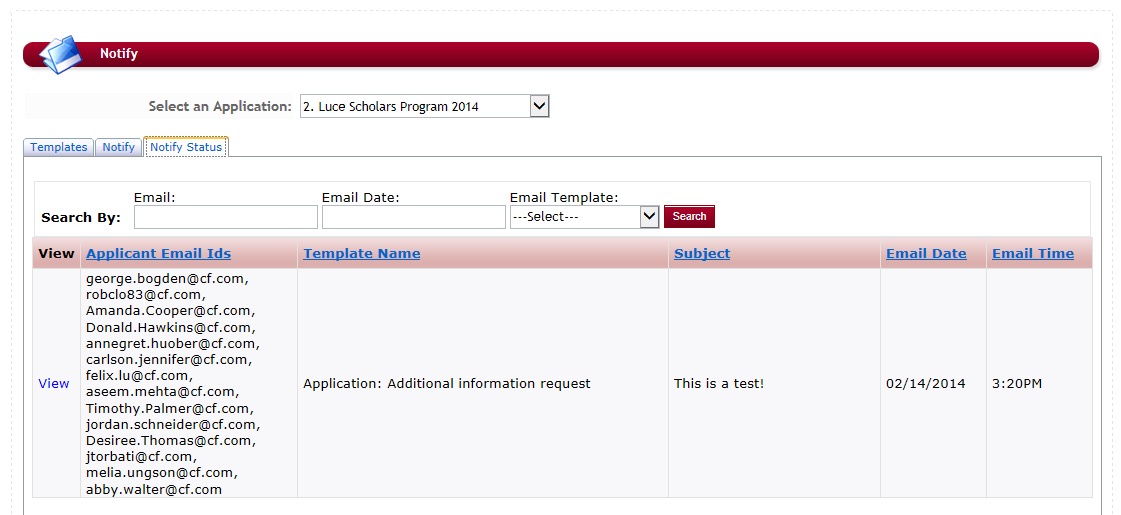
From this Screen you can see a listing of the Applicant Email ID’s the email was sent to, the Template Name that was used to send it, the Subject that was the subject line for that email, and the Date and the Time the email was sent.
Step 3: Click on view to preview the email that was sent.
1.7 Using Merge Fields
Below is the listing of merge fields found in the various email templates and the item it is looking at in the site to populate it.
Important Note:if a merge field is not listed in the Merge field listing for a specific template, then that merge field cannot be used in that template. If you use a merge field that is not available, the results will return as void.
Applicant FirstName {FirstName} – The applicant’s login user account First Name
Applicant LastName {LastName} – The applicant’s login user account Last Name
Applicant Email {EmailID} – The applicant’s login user account Email
Reviewer First Name {Reviewer First Name} – First name of the Reviewer assigned to review the application.
Reviewer Last Name {Reviewer Last Name} – Last name of the Reviewer assigned to review the application.
Reviewer Email {EmailID} – Email address of the Reviewer assigned to review the application.
Grants/Fellowship Name {Grants/Fellowships Name} – Funding source name entered in the funding source setup.
Application Name {Application Name} – Application form name entered in the General Information setup for the application.
Application Deadline Date {Deadline Date} – Deadline Date entered in the General Information setup for the application.
Application Contact Person First Name {Contact First Name} – The first name of the Contact Person that was entered in the Application’s General Information setup, Contact section.
Application Contact Person Last Name {Contact Last Name} – The Last name of the Contact Person that was entered in the Application’s General Information setup, Contact section.
Application Contact Email {Contact Email} – The email address of the Contact Person that was entered in the Application’s General Information setup, Contact section.
Application Contact Phone {Contact Phone} – The phone number of the Contact Person that was entered in the Application’s General Information setup, Contact section
Final Award {Final Award} – this will list all the awards awarded to an applicant in the Manage Awards, or the Batch Awards. It will list the name and the amount of the award.
Scholarship Signature (site setting) {Signature} – this is the signature line that was entered in the Email Signature editor box when setting up the funding source associated to this application in the funding source setup. If this box was left blank in the setup, it will default to the signature set up in the Administration>Site Settings: General Settings: Signature.
Reply-To-Email {Reply-To-Email} – The email address that was entered in the Application’s General Information setup “Reply Sent From” field.
Reply-To-Email {Reply-To-Email} – The email address that was entered in the Application’s General Information setup “Reply Sent From” field.
User Password {Password} – The user’s login user account password.
Additional Optional Details {Comments} – when sending email request from various areas in the site, there are occasions where you will see a “Comments” box appear, where you can add a comment to the recipient. (I.e. release a section, applicant’s request to recommenders in request sections, etc.) The custom-system email template that is linked to that specific item should contain a merge field of “Comments”. The comments you enter in those comment boxes would then appear in the email. Therefore, it is important to not remove this from those email templates that contain it. The “comments” field will only be available on those templates. All other templates would return a blank field.
Recommender Full Name {Recommender Name} – name of the individual the applicant has requested to complete the recommend section.
Request Section Access Link {Request Details Link} – the direct access URL link to the section the individual has been requested to complete.
Denies Link {Denies Link} – link a requested individual can use to deny the request to complete the request section.
Access Code {AccessCode} – The Nominator login access code given to nominators of request section to use to login using the Nominator Login feature.
URL {URL} –URL link given to recommended individuals in request section to access the site to login.
Released Sections{Sections} –This shows the applicant the section name for the section(s) that are being released back that need to be completed.
Section Deadline Date {Section Due Date} – the deadline date of the section that was entered in the section setup.