Section Release can be accessed in two different locations:
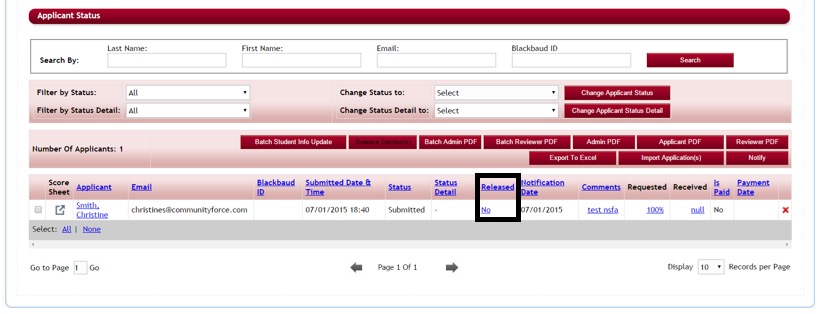
1. Evaluations>Applicant Status report
- Select the Yes/No under the Released column for the applicant you want to release the section for.
2. Evaluations>Section Release
Step 1: From the Home page select Evaluations.
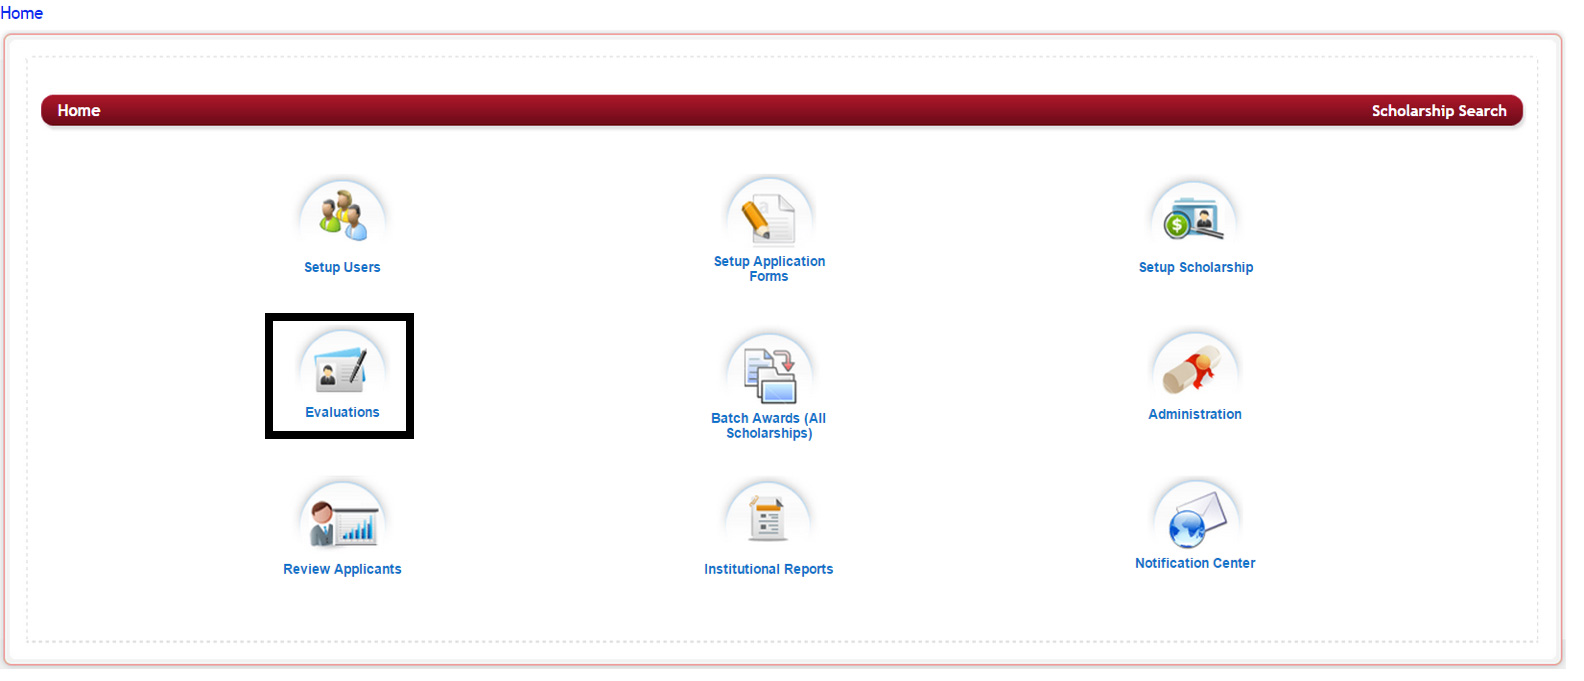
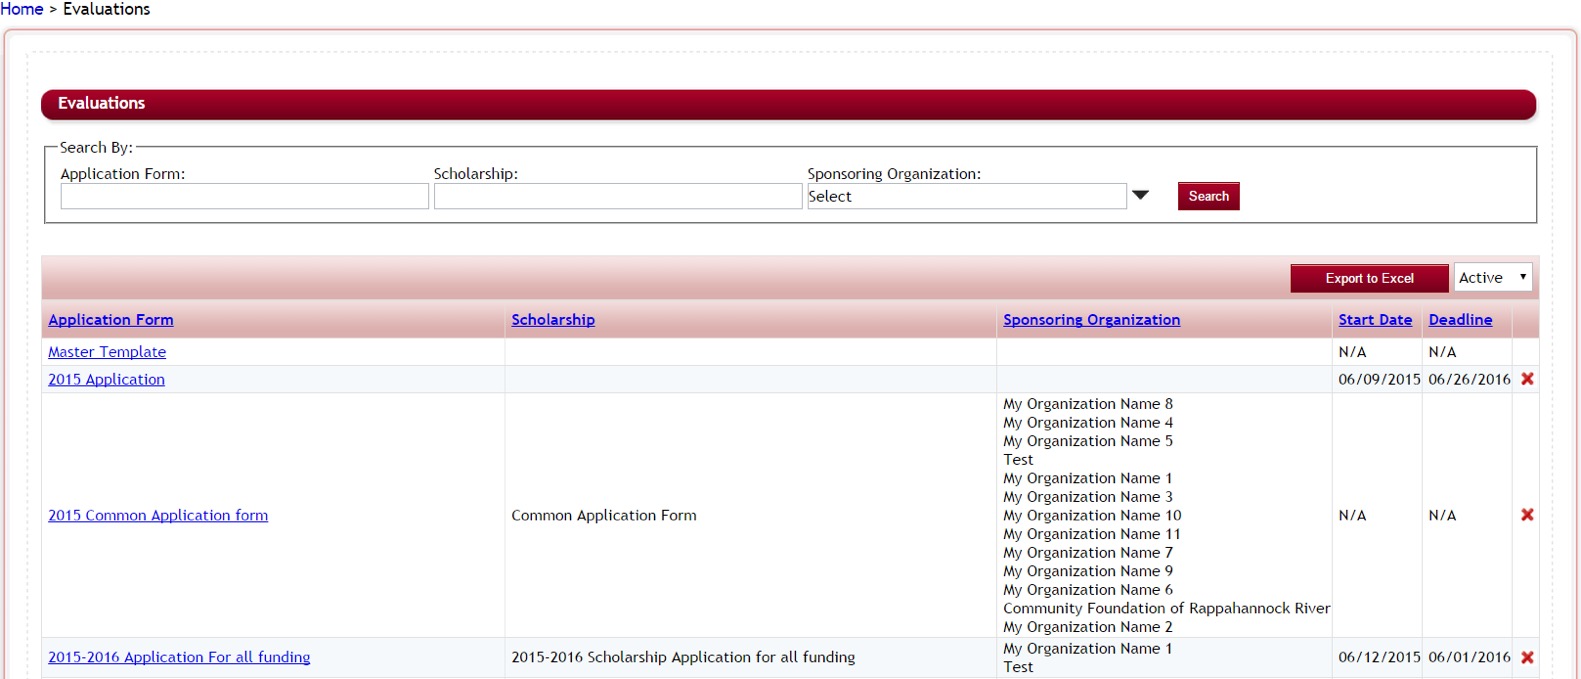
Step 2: In the Evaluation Application listing, select the application you want to release the sections on.
Step 3: The Evaluation dashboard will open, select the Section Release icon
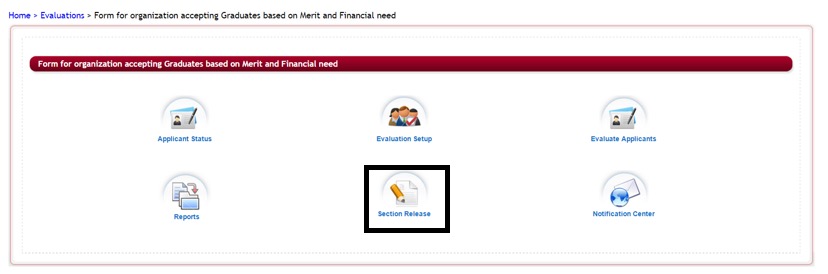
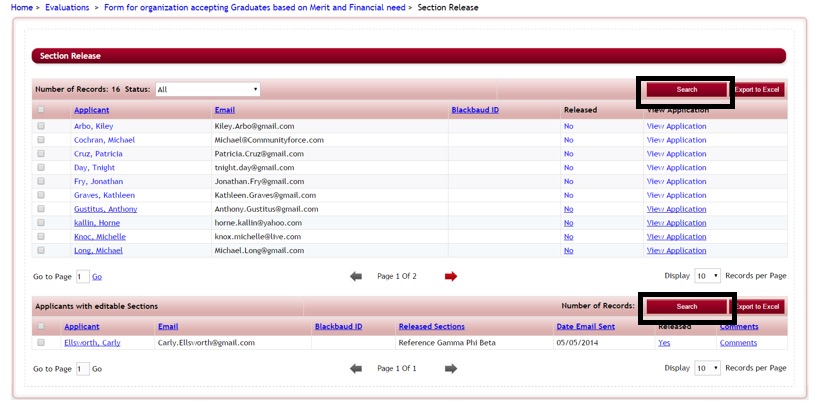
Step 4: The following Section Release screen will display:
Number of Records: You can filter for applicants with a specific status from the status dropdown and can view all the applicants falling under that status category. The number listed is the number of applicants according to the status selected. All is the default.
![]()
Applicant- click on the applicant name to look to look at the applicant dashboard
Email – is the email address that the release request will be sent to.
Released – Current release status of the applicant No means the applicant does not have any released sections.
View Application – click on the view application link to view the applicant’s application summary report.
The top section of the screen will show you all the applicants listed that have do not have a section released and the bottom section shows the applicants that currently have sections that have been released and need to be edited.
Export to Excel:
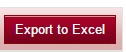
You can export the entire listing of applicants by clicking on Export to Excel button.
3.3 Searching for an applicant in Section Release
While in the Evaluations>Section Release, you can do a Search and find a specific applicant that has applied for this application. You can search applicants that have not been released as well as on applicant that have sections released to be edited.
Step 1: Click the Search button located at the top of the section you want to search on:
![]()
Step 2: A new window will open up. Enter the one or all of the search criteria and click on Search button to find that particular applicant(s) with that search criteria.
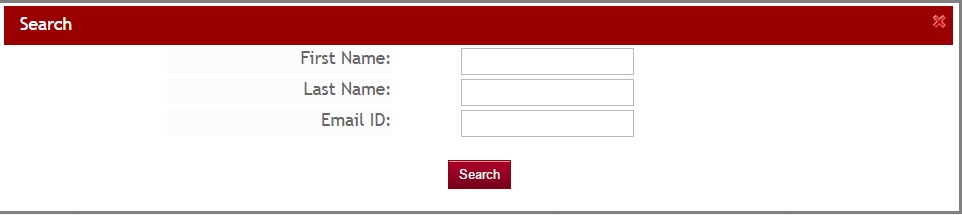
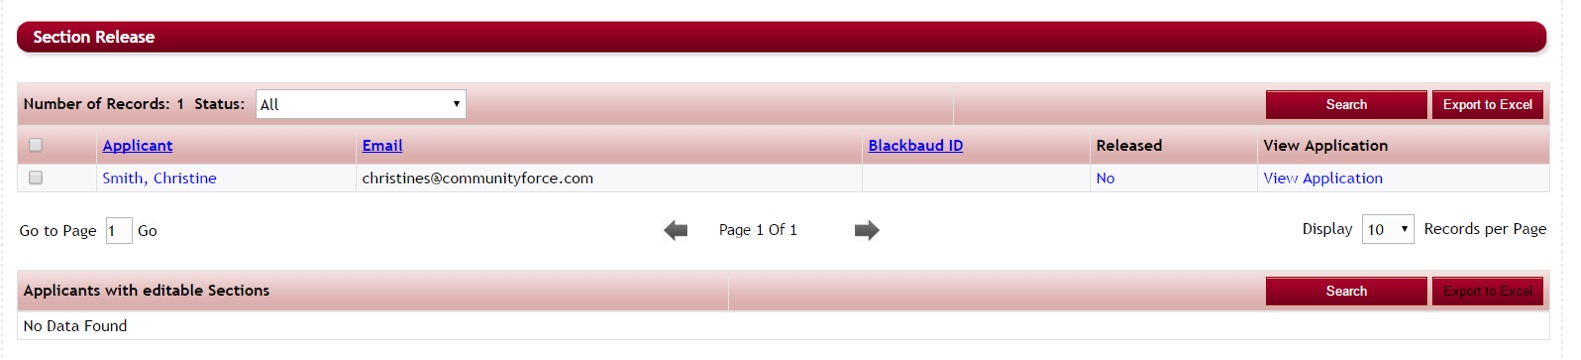
Step 3: Only the applicants that match the search criteria will appear in the section listing that you searched on:
3.4 Releasing a Section(s) to an Applicant
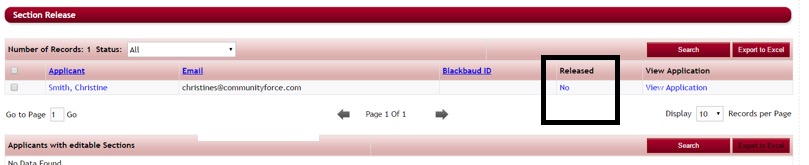
Step 1: Click on the No link under the Released column.
Step 2: The following screen will open, showing all the sections in the application that can be released back to the applicant:
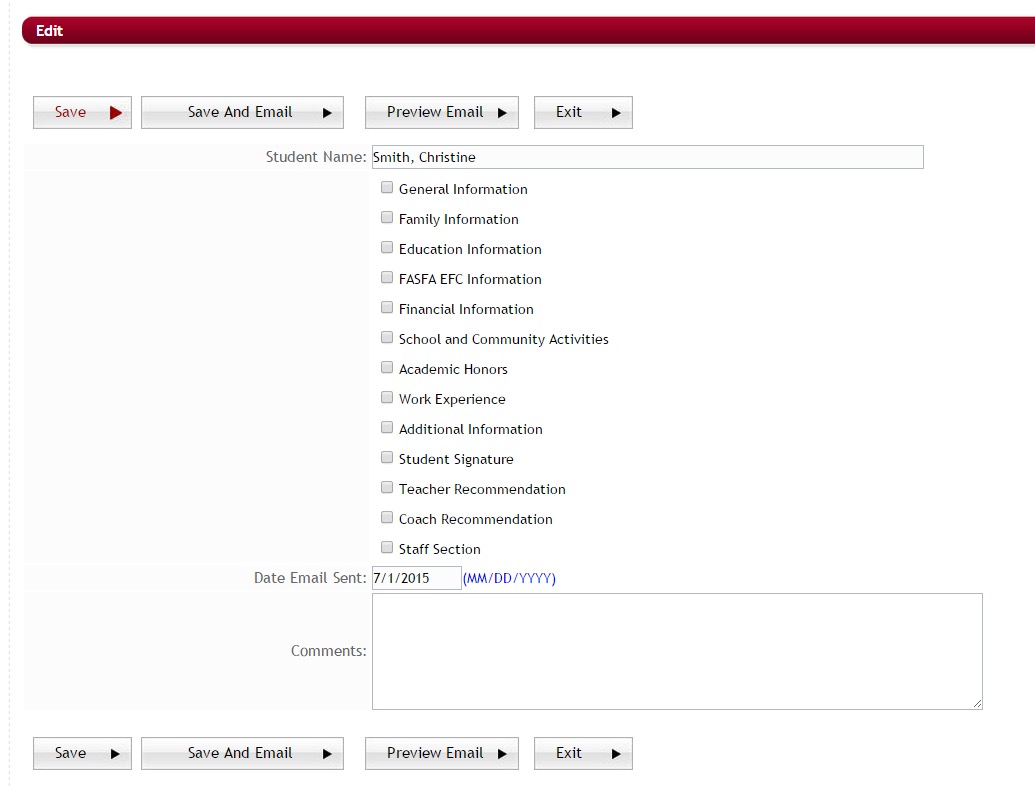
Step 3: Place a check in the box next to the section you wish to release back to the student.
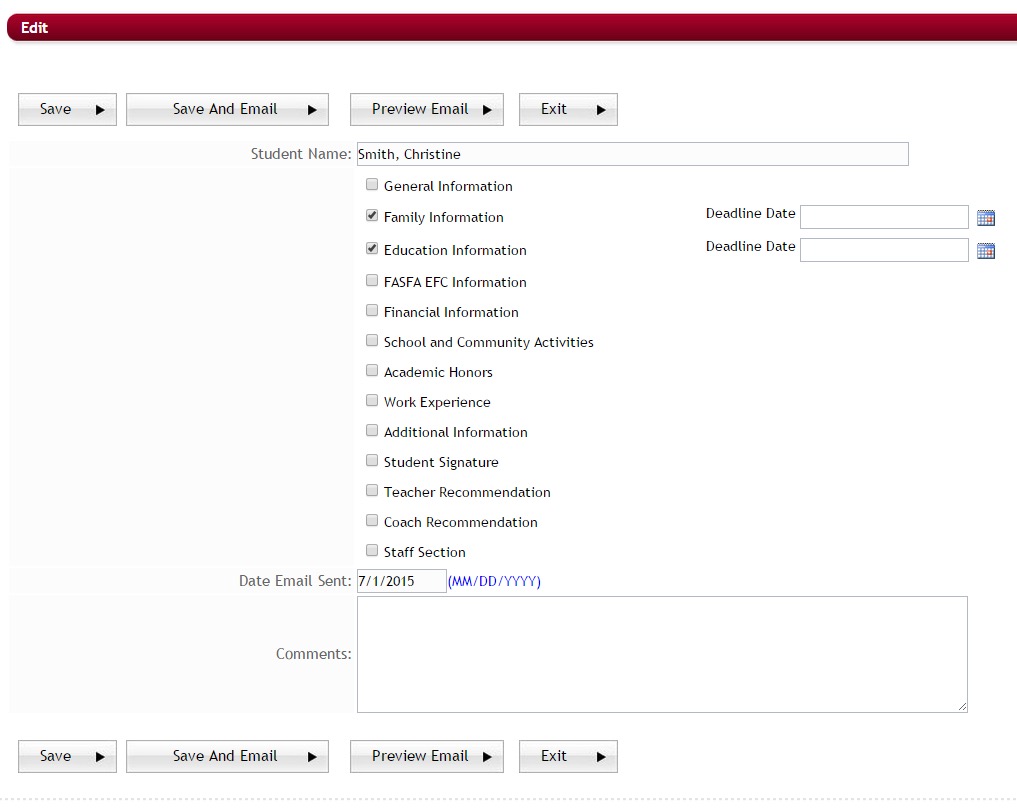
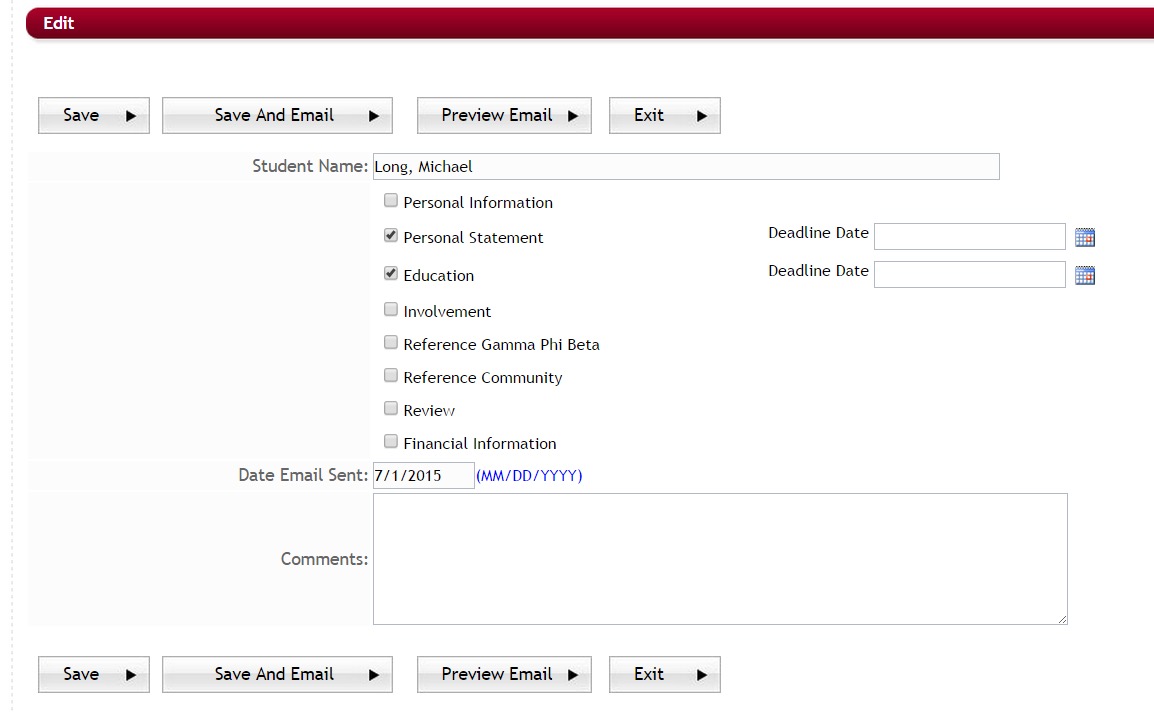
Note: Only sections you release will be editable. All other sections the applicant filled out originally will be in a read only mode.
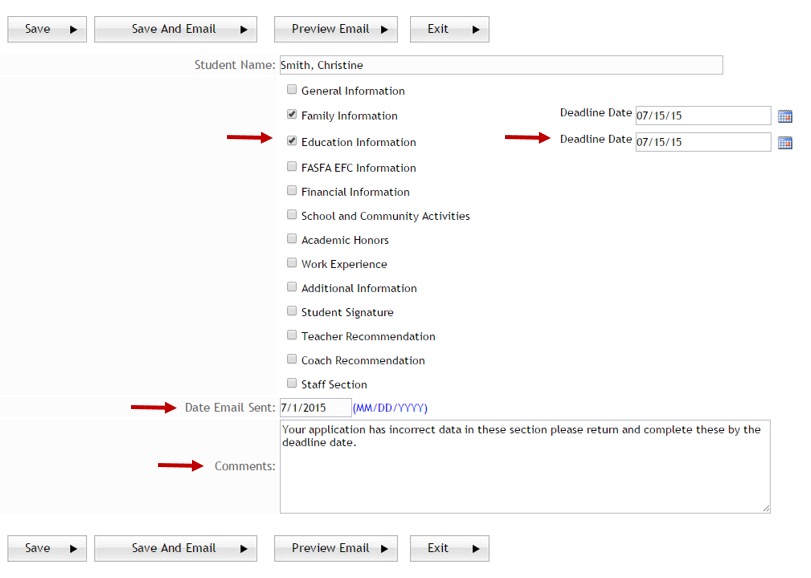
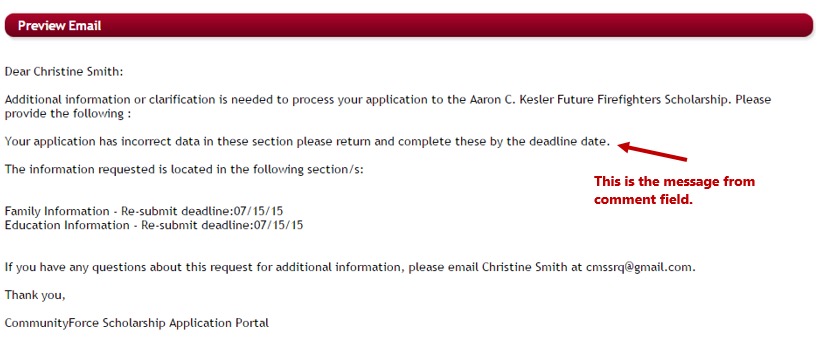
Step 4: Once you select the section a Deadline Date field will appear to the right of the section. Enter a new deadline date for the applicant to complete the section by. The applicant will have until that date to change the information.
Step 5: Confirm the Date Email Sent: this is the date the email will be sent to the applicant notifying them that the section was release back and that more information is required to be completed. (The email template that is sent to the applicant is the email template in your Notification Center – Application: Additional Information Requested. Please be sure to update this email template prior to releasing any sections back to your applicants.)
Step 6: Comments – Enter a brief comment to the applicant to be included in the body of the email (Comment Field) explaining why they are receiving this email.
Step 5: Preview Email:allows you to preview your email prior to sending it to the applicant.
Step 6: Save and Email: saves the information and sends the email to the applicant notifying them to complete the released section.
Save: (only use if you do not want to send an email) this will release the section(s) to the applicant and will save the information with comments, but will not email the applicant.
Exit:cancels the release and returns you to the Section Release report
Step 7: You will receive a Confirm message showing the sections you are releasing. Click Send Mail to continue.
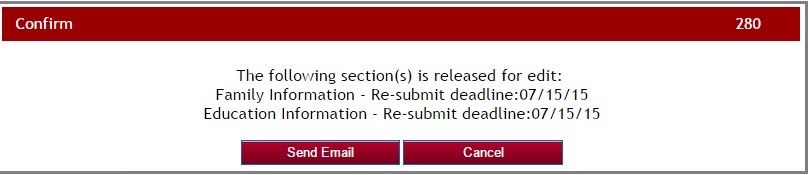
Step 8: Once you return to the Section Release Report the applicant’s name will now appear in the bottom section of that report: Applicants with editable Sections. Each section that has been released will show.

3.5 Viewing Released Applicants
Applicants that have sections released that are pending completion will show in the bottom section of the Section Release Report: Applicants with editable Sections.

Applicant- click on the applicant name to look to look at the applicant dashboard
Email – is the email address that the released request was sent to.
Released Sections – this is the section(s) that have been released back to the applicant to complete.
Date Email Sent – date that the Additional Information Requested email was sent to the applicant notifying them to complete the section(s).
Released – Yes shows that the sections are still released.
- Note: an applicant must hit the submit button again in order for the release status to change back to NO and their application status back to Submitted.
Comments: any comments that were entered in the comment box by the Admin when releasing the section to the applicant.
The applicant will now show in your Evaluations>Applicant Status Report as a status of “Additional Info Requested”.
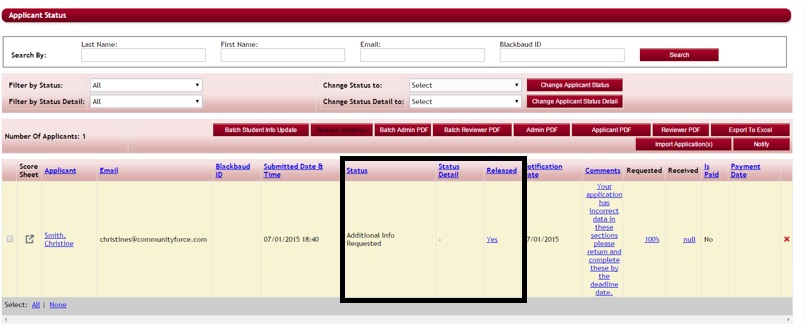
You can click on the “Yes” located under the Released column to view the sections that have been released and to resend the Section Release notification with a new deadline date.

You can edit a deadline, un-release an existing released section, or release a new section.