There may be organizations that process applications across multiple departments within their organizations as well as organizations that process applications for multiple organizations. The Sponsoring Organization setting allows the Global Admin to enter multiple sponsoring organizations and connect specific funds, applications, and user accounts to those separate organizations.
3.1 Adding Sponsoring Organizations
Exercise 1
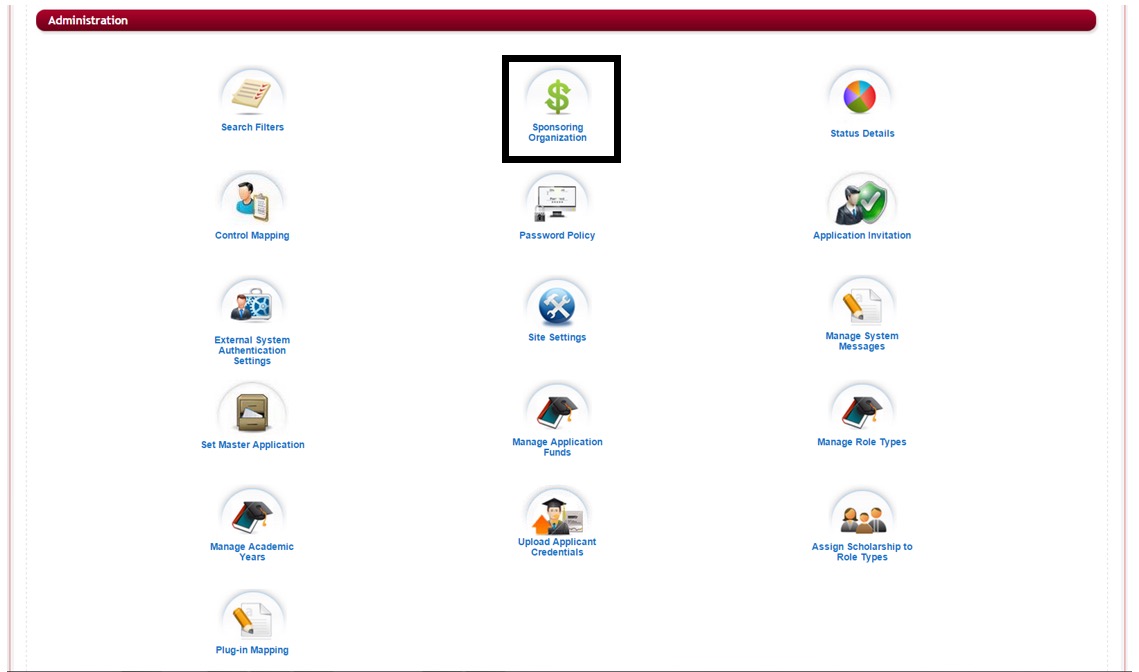
Step 1: From the Administration Dashboard click on the Sponsoring Organization Icon

Step 2: The Sponsoring Organization page will open:
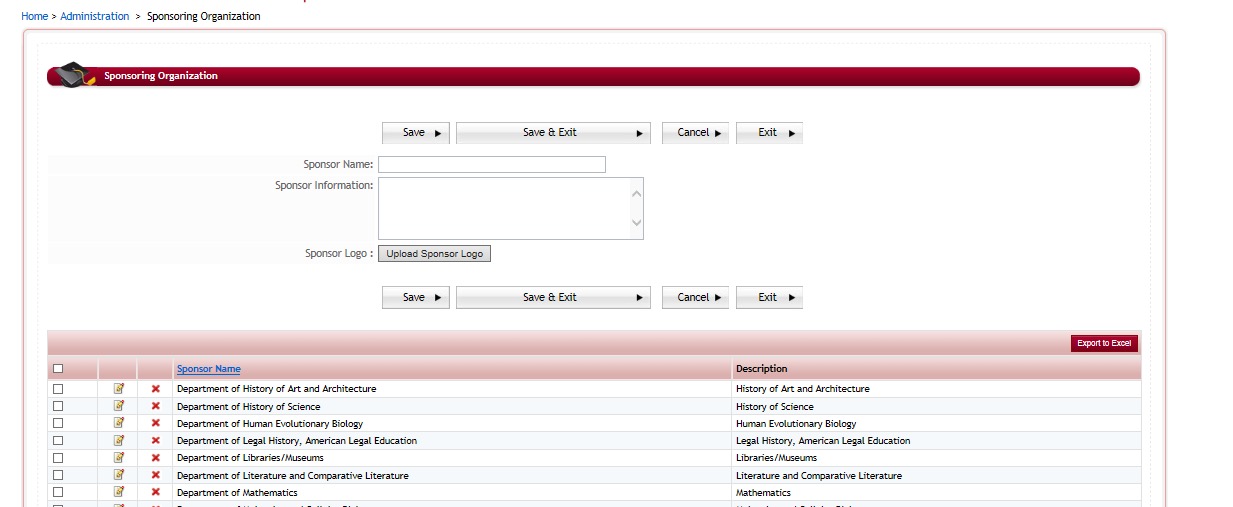
Step 3: Sponsoring Organization Name – Add a new Sponsoring Organization by typing a Sponsor Name in the Sponsoring Organization Name field. If you only have one organization then you will only enter that one organization’s information as the Sponsor for all your applications/funds.
Step 4: Sponsoring Organization Information – Enter a brief description for the Organization.
Step 5: Sponsoring Organization Logo – If you have a logo for this organization, upload the logo for this Organization by clicking on the Upload Sponsor Logo.
Logos must be formatted:
Max Height: 80px
Max Width: 400px
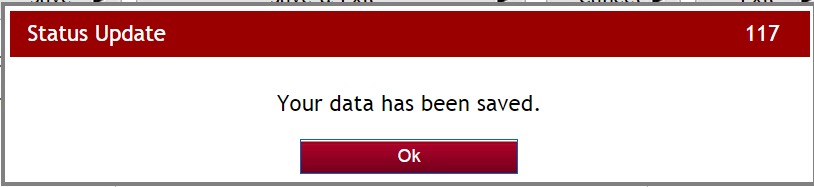
Step 6: After you have entered information. Click Save and a System Message will appear. Click OK to continue.
Step 7: The new sponsoring organization will appear in the table grid below.

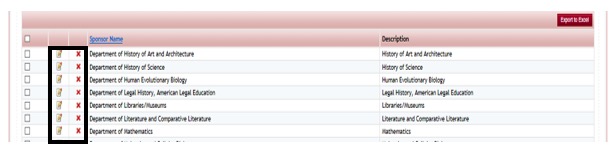
![]() – You can click the Export to Excel to open the listing of the table grid to and Excel document.
– You can click the Export to Excel to open the listing of the table grid to and Excel document.
Save – Saves your changes and stays on the page
Save & Exit – Saves your changes and exits to the Administration Dashboard
Cancel – Cancels your changes and stays on the page
Exit – Does not save any changes and exits to the Administration Dashboard
3.2 Editing a Sponsoring Organization:
To edit an existing sponsoring organization in the table listing, click on the edit icon![]() to the left of the organization you wish to edit. Their information will appear in the top section, make your changes and click Save for the changes to be saved.
to the left of the organization you wish to edit. Their information will appear in the top section, make your changes and click Save for the changes to be saved.
Delete – Select the red “X” to the left of the organization you wish to delete. You will receive a confirmation to delete message, answer “yes” to delete.