Control Mapping allows you to change the Control Name Labels on all the icons located within the various dashboards on your site.
Important: If you change any of the label names, please keep a list of the old name so that you can refer to the original label when reviewing our help guides, training videos and when putting in a request for support.
5.1 Changing a Control Name Label
Exercise 1
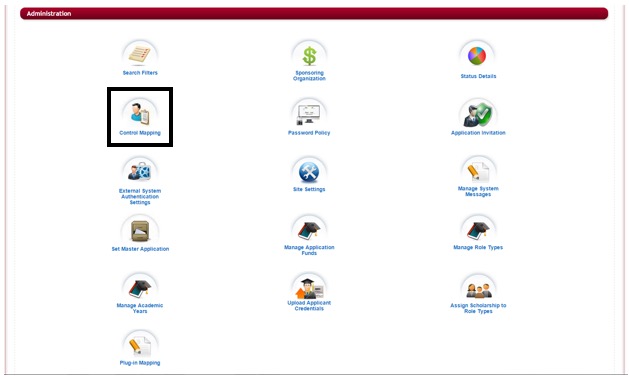
Step 1: From the Administration Dashboard click on the Control Mapping Icon.
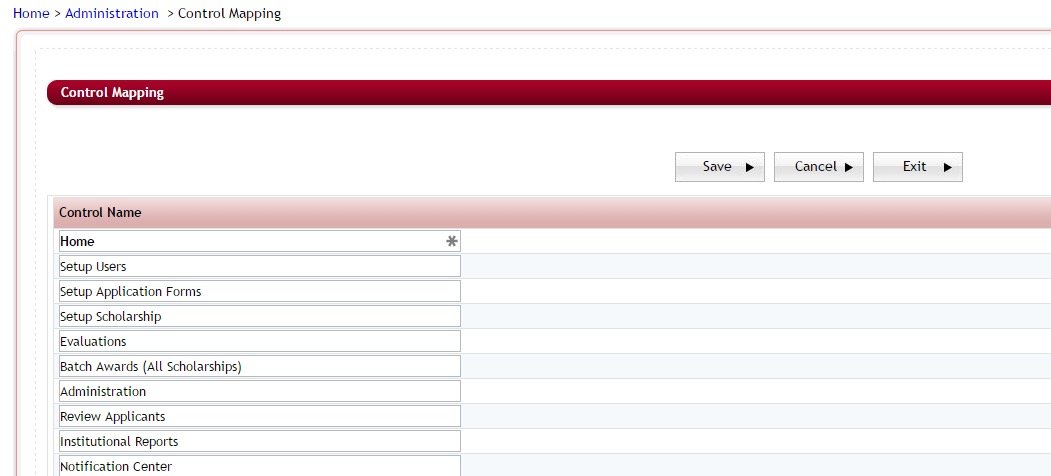
Step 2: The Control Mapping listing will appear, showing all the icon items for every dashboard on the CommunityForce site.
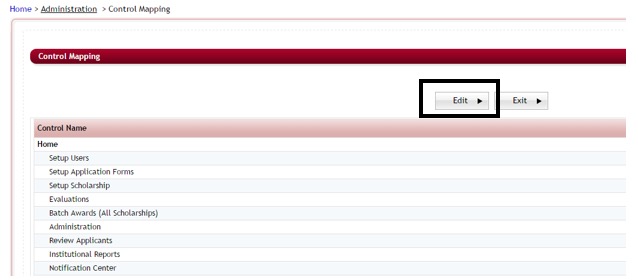
Step 3: Click the Edit button to open up the Fields for editing.
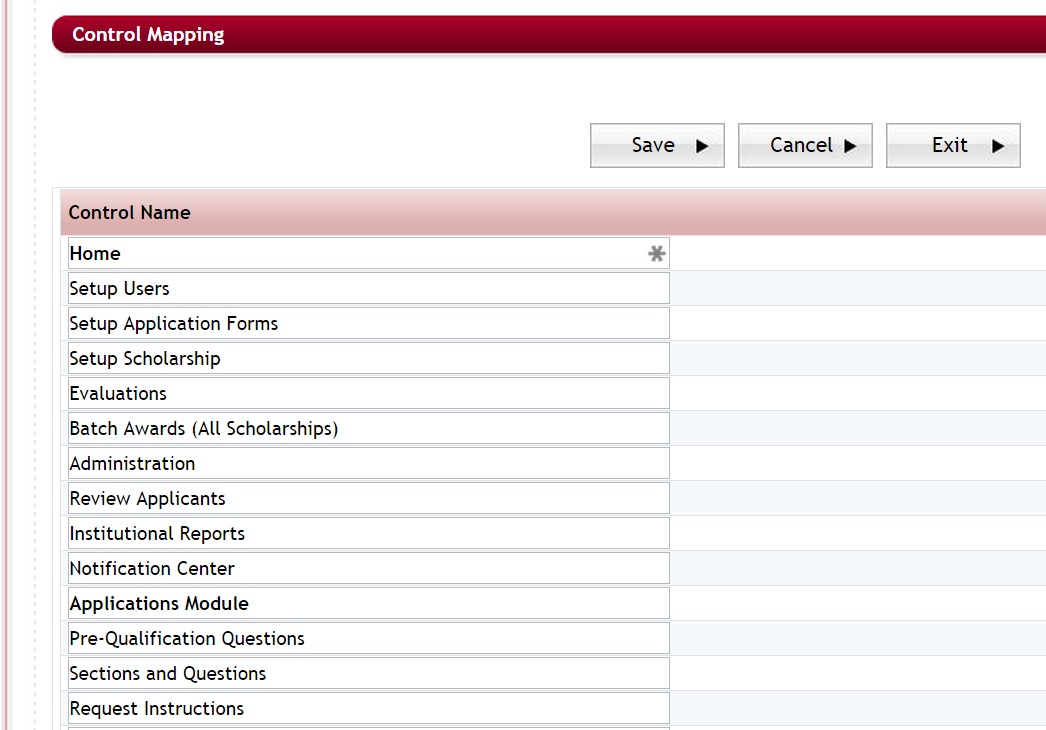
Step 4: Locate the control name item(s) you want to edit, and type the new label name for each control name you want to change by typing over the existing name. Items that are bolded are the name of the actual dashboard that contains the icon.
- Caution: If you change the name of an item, use caution not to duplicate a name already used on another label, especially when renaming the actual dashboard name do not change the dashboard name to another dashboard that already exists. The only labels that should carry the same name are labels for icons that direct you to a dashboard named the same as the icon. (i.e. the Evaluation Setup icon on the Evaluations Dashboard, directs you to the Evaluation Setup dashboard both those items can have the same label name)
Step 5: Once you have changed all the items you want changed, click the Save button to save the changes you have made to the label prior to exiting and returning to the Administration Dashboard.